
Monday, 24 August, 2020
OCR in Java with Tess4J
Optical character recognition (OCR) is the conversion of images containing text to machine-encoded text. A popular tool for this is the open source project Tesseract. Tesseract can be used as standalone application from the command line. Alternatively it can be integrated into applications using its C++ API. For other programming languages various wrapper APIs are available. In this post we will use the Java Wrapper Tess4J.
Getting started
We start with adding the Tess4J maven dependency to our project:
<dependency>
    <groupId>net.sourceforge.tess4j</groupId>
    <artifactId>tess4j</artifactId>
    <version>4.5.2</version>
</dependency>
Next we need to make sure the native libraries required by Tess4j are accessible from our application. Tess4J jar files ship with native libraries included. However, they need to be extracted before they can be loaded. We can do this programmatically using a Tess4J utility method:
File tmpFolder = LoadLibs.extractTessResources("win32-x86-64");
System.setProperty("java.library.path", tmpFolder.getPath());
With LoadLibs.extractTessResources(..) we can extract resources from the jar file to a local temp directory. Note that the argument (here win32-x86-64) depends on the system you are using. You can see available options by looking into the Tess4J jar file. We can instruct Java to load native libraries from the temp directory by setting the Java system property java.library.path.
Other options to provide the libraries might be installing Tesseract on your system. If you do not want to change the java.library.path property you can also manually load the libraries using System.load(..).
Next we need to provide language dependent data files to Tesseract. These data files contain trained models for Tesseracts LSTM OCR engine and can be downloaded from GitHub. For example, for detecting german text we have to download deu.traineddata (deu is the ISO 3166-1-alpha-3 country code for Germany). We place one or more downloaded data files in the resources/data directory.
Detecting Text
Now we are ready to use Tesseract within our Java application. The following snippet shows a minimal example:
Tesseract tesseract = new Tesseract();
tesseract.setLanguage("deu");
tesseract.setOcrEngineMode(1);

Path dataDirectory = Paths.get(ClassLoader.getSystemResource("data").toURI());
tesseract.setDatapath(dataDirectory.toString());

BufferedImage image = ImageIO.read(Main.class.getResourceAsStream("/ocrexample.jpg"));
String result = tesseract.doOCR(image);
System.out.println(result);
First we create a new Tesseract instance. We set the language we want to recognize (here: german). With setOcrEngineMode(1) we tell Tesseract to use the LSTM OCR engine.
Next we set the data directory with setDatapath(..) to the directory containing our downloaded LSTM models (here: resources/data).
Finally we load an example image from the classpath and use the doOCR(..) method to perform character recognition. As a result we get a String containing detected characters.
For example, feeding Tesseract with this photo from the German wikipedia OCR article might produce the following text output.
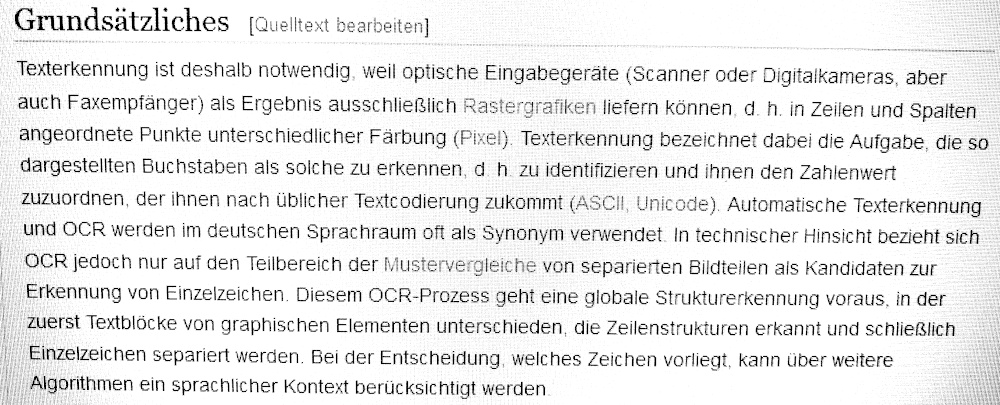
Text output:
Grundsätzliches [Quelltext bearbeiten]
Texterkennung ist deshalb notwendig, weil optische Eingabegeräte (Scanner oder Digitalkameras, aber
auch Faxempfänger) als Ergebnis ausschließlich Rastergrafiken liefern können. d. h. in Zeiten und Spaten
angeordnete Punkte unterschiedlicher Färbung (Pixel). Texterkennung bezeichnet dabei die Aufgabe, die so
dargestellten Buchstaben als solche zu erkennen, dh. zu identifizieren und ihnen den Zahlenwert
zuzuordnen, der ihnen nach üblicher Textcodierung zukommt (ASCII, Unicode). Automatische Texterkennung
und OCR werden im deutschen Sprachraum oft als Synonym verwendet In technischer Hinsicht bezieht sich
OCR jedoch nur auf den Teilbereich der Muster vergleiche von separierten Bildteilen als Kandidaten zur
( Erkennung von Einzelzeichen. Diesem OCR—Prozess geht eine globale Strukturerkennung voraus, in der
zuerst Textblöcke von graphischen Elementen unterschieden, die Zeilenstrukturen erkannt und schließlich
| Einzeizeichen separiert werden. Bei der Entscheidung, welches Zeichen vorliegt, kann über weitere
\ . Algorithmen ein sprachlicher Kontext berücksichtigt werden
Summary
Tesseract is a popular open source project for OCR. With Tess4J we can access the Tesseract API in Java. A little bit of set up is required for loading native libraries and downloading Tesseracts LSTM data. After that it is quite easy to perform OCR in Java. If you are not happy with the recognized text it is a good idea to have a look at the Improving the quality of the output section of the Tesseract documentation.
You can find the source code for the shown example on GitHub.
Tags: Java