mscharhag, Programming and Stuff;

A blog about programming and software development topics, mostly focused on Java technologies including Java EE, Spring and Grails.

Posts tagged with JUnit

  • Tuesday, 11 August, 2020

    Extending JUnit 5 (Jupiter)

    In this post we will learn how JUnit 5 extensions work and how we can create custom extensions.

    A look into the past: Runners and Rules

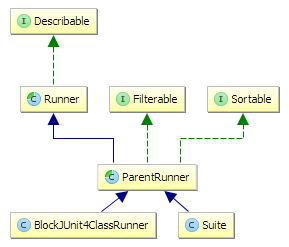
    With JUnit 4 we have the option to run tests with a custom JUnit runner (indicated by the @RunWith annotation). This allows us to modify the way tests are executed with JUnit. However, JUnit runners are not that easy to implement. They also suffer on the major limitation that only one runner can be used in a test.

    With JUnit 4.7 Rules were introduced. Rules use a different concept to customize tests. It is also possible to use multiple rules within a test. So from this point JUnit 4 had two different ways (with different up and downsides) to customize test behavior.

    JUnit 5 introduces extensions

    This whole customization mechanism has changed with JUnit 5 which introduced extensions. Extensions can be added to tests in various ways. The most common way is the @ExtendWith annotation that can be used on test classes or on single test methods. For example:

    @ExtendWith(MyFirstExtension.class)
    public class DemoTest {
    
        @Test
        public void test() {
            // uses MyFirstExtension
        }
    
        @Test
        @ExtendWith(MySecondExtension.class)
        public void test2() {
            // uses MyFirstExtension and MySecondExtension
        }
    }

    Extensions added to the test class will be used for all test methods within the class.

    Multiple extensions can be registered by passing an array of extensions to the @ExtendWith annotation:

    @ExtendWith({ MyFirstExtension.class, MySecondExtension.class })
    public class DemoTest {
        ...
    }

    @ExtendWith is also a repeatable annotation, so it can be added multiple times:

    @ExtendWith(MyFirstExtension.class)
    @ExtendWith(MySecondExtension.class)
    public class DemoTest {
        ...
    }

    Note that @ExtendWith can be composed to other annotations. For example, we can come up with our own annotation that is annotated with @ExtendWith:

    @Retention(RetentionPolicy.RUNTIME)
    @ExtendWith(MockWebServerExtension.class)
    @ExtendWith(MockDatabaseExtension.class)
    @Target(ElementType.TYPE)
    public @interface IntegrationTest {}

    We can now annotate our test with @IntegrationTest and JUnit 5 will run the tests using the two extensions defined in @IntegrationTest:

    @IntegrationTest
    public class DemoTest {
        ...
    }

    While the @ExtendWith annotation is easy to use and works fine in most situations it has a drawback. Sometimes test code needs to interact with an extension or the extension might need some sort of configuration or setup code. This cannot be done if the extension is defined with @ExtendWith.

    In these situations we can create the extension manually, assign it to a field and add the @RegisterExtension annotation. For example lets look at a fictional extension that manages temporary files in a test:

    public class DemoTest {
    
        @RegisterExtension
        static TempFileExtension tempFiles = TempFileExtension.builder()
                .setDirectory("/tmp")
                .deleteAfterTestExecution(true)
                .build();
    
        @Test
        public void test() {
            File f = tempFiles.newTempFile("foobar.tmp");
            ...
        }
    }

    Using a @RegisterExtension on a field gives us the option to configure the extension and to interact with the extension in test methods.

    Creating custom extensions

    Creating a custom extension for JUnit 5 is quite easy. We just have to create a class that implements one or more of JUnits extension interfaces.

    Assume we want to create a simple extension that measures how long a test runs. For this we create a new class that implements the interface InvocationInterceptor.

    public class TestDurationReportExtension implements InvocationInterceptor {
    
        @Override
        public void interceptTestMethod(Invocation<Void> invocation,
                ReflectiveInvocationContext<Method> invocationContext,
                ExtensionContext extensionContext) throws Throwable {
    
            long beforeTest = System.currentTimeMillis();
            try {
                invocation.proceed();
            } finally {
                long afterTest = System.currentTimeMillis();
                long duration = afterTest - beforeTest;
                
                String testClassName = invocationContext.getTargetClass().getSimpleName();
                String testMethodName = invocationContext.getExecutable().getName();
                System.out.println(String.format("%s.%s: %dms", testClassName, testMethodName, duration));
            }
        }
    }

    InvocationInterceptor has various methods with default implementations. We override the implementation of interceptTestMethod(..). This method lets us run code before and after a test method is executed. With the proceed() method of the Invocation method parameter we can proceed with the actual test execution.

    We simply subtract the system time before the test from the system time after the test execution to get the duration. After that, we use the InvocationContext parameter to obtain the names of the test class and test method. With this information we create a formatted output message.

    Now we can extend tests with our TestDurationReportExtension by using the @ExtendWith annotation:

    @ExtendWith(TestDurationReportExtension.class)
    public class DemoTest { .. }

    When running tests, we will now see our extension output for every test method.

    The output for a test with two methods might look like this:

    DemoTest.slowTest: 64ms
    DemoTest.fastTest: 6ms

    Extension interfaces

    InvocationInterceptor is just one various extension interfaces. In this section, we will briefly look over these different interfaces and for what they can be used.

    Conditional test execution

    By implementing the interface ExecutionCondition an extension can decide if a test should be executed. This lets the extension decide if certain tests should be skipped. A simple example is the standard extension DisabledCondition that skips tests annotated with @Disabled.

    Test instance factories

    By default JUnit 5 will instantiate test classes by invoking the available constructor (if multiple test constructors are available an exception will be thrown). Possible constructor arguments are resolved using ParameterResolver extensions (see below).

    This default behavior can be customized using the TestInstanceFactory interface. An Extension that implements TestInstanceFactory is used as factory for creating test class instances. This is can be used to create Tests via static factory methods or to inject additional parameters into the test constructor.

    Processing test instances

    After a test instance has been created, the TestInstancePostProcessor interface can be used to post process test instances. A common extension use case for this is the injection of dependencies into fields of the test instance. Similarly the TestInstancePreDestroyCallback can be used to run custom cleanup logic, when a test has finished and the instance is no longer needed.

    Test parameter resolution

    Test class constructors or methods annotated with @Test, @BeforeEach, @BeforeAll etc. can contain parameters. These parameters are resolved at runtime by JUnit using ParameterResolvers. Extensions can implement ParameterResolver if they want to support additional parameters.

    Test Lifecycle callbacks and interceptions

    JUnit 5 provides a couple of test lifecycle callback interfaces that can be implemented by extensions:

    • BeforeAllCallback, runs before @BeforeAll methods in the test class
    • BeforeEachCallback, runs before @BeforeEach methods in the test class
    • BeforeTestExecutionCallback, runs before the test method
    • AfterTestExecutionCallback, runs after the test method
    • AfterEachCallback, runs after @AfterEach methods in the test class
    • AfterAllCallback, runs after @AfterAll methods in the test class

    Those interfaces provide a simple callback to do something at a certain time in the test lifecycle.

    Additionally there is the InvocationInterceptor interface we already used in the extension example above. InvocationInterceptor has similar methods as the callback interfaces. However, InvocationInterceptor gives us an Invocation parameter that allows us to manually continue the lifecycle by calling the proceed() method. This is useful if we want to wrap code around the invocation, like a try/catch block.

    Summary

    Writing extensions for JUnit 5 is quite easy. We just have to create a class that implements one or more of JUnits extension interfaces. Extensions can be added to test classes (or methods) using the @ExtendWith and @RegisterExtension annotations. You can find the source code for the example extension on GitHub. Also make sure to checkout the excellent JUnit 5 user guide.

  • Friday, 15 August, 2014

    Understanding JUnit's Runner architecture

    Update (2020): This post describes how JUnit 4 runners work and how you can create you own JUnit 4 runner. Please note that JUnit 5 is available for few years now (it has been released 2017). Maybe you should consider updating your project to JUnit 5 if you are still using JUnit 4. If you are interested in JUnit 5 you might be interested in my article about creating custom extensions for JUnit 5.


    Some weeks ago I started creating a small JUnit Runner. I learned that creating custom JUnit Runners is actually quite simple. In this post I want to show you how JUnit Runners work internally and how you can use custom Runners to modify the test execution process of JUnit.

    So what is a JUnit Runner?

    A JUnit Runner is class that extends JUnit's abstract Runner class. Runners are used for running test classes. The Runner that should be used to run a test can be set using the @RunWith annotation.

    @RunWith(MyTestRunner.class)
    public class MyTestClass {
    
      @Test
      public void myTest() {
        ..
      }
    }

    JUnit tests are started using the JUnitCore class. This can either be done by running it from command line or using one of its various run() methods (this is what your IDE does for you if you press the run test button).

    JUnitCore.runClasses(MyTestClass.class);

    JUnitCore then uses reflection to find an appropriate Runner for the passed test classes. One step here is to look for a @RunWith annotation on the test class. If no other Runner is found the default runner (BlockJUnit4ClassRunner) will be used. The Runner will be instantiated and the test class will be passed to the Runner. Now it is Job of the Runner to instantiate and run the passed test class.

    How do JUnit Runners work?

    Lets look at the class hierarchy of standard JUnit Runners:

    Runner is a very simple class that implements the Describable interface and has two abstract methods:

    public abstract class Runner implements Describable {
    
      public abstract Description getDescription();
    
      public abstract void run(RunNotifier notifier);
    }

    The method getDescription() is inherited from Describable and has to return a Description. Descriptions contain the information that is later being exported and used by various tools. For example, your IDE might use this information to display the test results.
    run() is a very generic method that runs something (e.g. a test class or a test suite). I think usually Runner is not the class you want to extend (it is just too generous).

    In ParentRunner things get a bit more specific. ParentRunner is an abstract base class for Runners that have multiple children. It is important to understand here, that tests are structured and executed in a hierarchical order (think of a tree).
    For example: You might run a test suite which contains other test suites. These test suites then might contain multiple test classes. And finally each test class can contain multiple test methods.

    ParentRunner has the following three abstract methods:

    public abstract class ParentRunner<T> extends Runner implements Filterable, Sortable {    
    
      protected abstract List<T> getChildren();
    
      protected abstract Description describeChild(T child);
    
      protected abstract void runChild(T child, RunNotifier notifier);
    }

    Subclasses need to return a list of the generic type T in getChildren(). ParentRunner then asks the subclass to create a Description for each child (describeChild()) and finally to run each child (runChild()).

    Now let's look at two standard ParentRunners: BlockJUnit4ClassRunner and Suite.

    BlockJUnit4ClassRunner is the default Runner that is used if no other Runner is provided. So this is the Runner that is typically used if you run a single test class. If you look at the source of BlockJUnit4ClassRunner you will see something like this:

    public class BlockJUnit4ClassRunner extends ParentRunner<FrameworkMethod> {
    
      @Override
      protected List<FrameworkMethod> getChildren() {
        // scan test class for methonds annotated with @Test
      }
    
      @Override
      protected Description describeChild(FrameworkMethod method) {
        // create Description based on method name
      }
    
      @Override
      protected void runChild(final FrameworkMethod method, RunNotifier notifier) {
        if (/* method not annotated with @Ignore */) {
          // run methods annotated with @Before
          // run test method
          // run methods annotated with @After
        }
      }
    }

    Of course this is overly simplified, but it shows what is essentially done in BlockJUnit4ClassRunner.

    The generic type parameter FrameworkMethod is basically a wrapper around java.lang.reflect.Method providing some convenience methods. In getChildren() the test class is scanned for methods annotated with @Test using reflection. The found methods are wrapped in FrameworkMethod objects and returned. describeChildren() creates a Description from the method name and runChild() finally runs the test method. BlockJUnit4ClassRunner uses a lot of protected methods internally. Depending on what you want to do exactly, it can be a good idea to check BlockJUnit4ClassRunner for methods you can override. You can have a look at the source of BlockJUnit4ClassRunner on GitHub.

    The Suite Runner is used to create test suites. Suites are collections of tests (or other suites). A simple suite definition looks like this:

    @RunWith(Suite.class)
    @Suite.SuiteClasses({
      MyJUnitTestClass1.class,
      MyJUnitTestClass2.class,
      MyOtherTestSuite.class
    })
    public class MyTestSuite {}

    A test suite is created by selecting the Suite Runner with the @RunWith annotation. If you look at the implementation of Suite you will see that it is actually very simple. The only thing Suite does, is to create Runner instances from the classes defined using the @SuiteClasses annotation. So getChildren() returns a list of Runners and runChild() delegates the execution to the corresponding runner.

    Examples for Custom JUnit runners

    With the provided information it should not be that hard to create your own JUnit Runner (at least I hope so). If you are looking for some example custom Runner implementations you can have a look at the following list:

    Conclusion

    JUnit Runners are highly customizable and give you the option to change to complete test execution process. The cool thing is that can change the whole test process and still use all the JUnit integration points of your IDE, build server, etc.

    If you only want to make minor changes it is a good idea to have a look at the protected methods of BlockJUnit4Class runner. Chances are high you find an overridable method at the right location.

    In case you are interested in Olaester, you should have a look at my blog post: An alternative approach of writing JUnit tests.

  • Saturday, 12 July, 2014

    An alternative approach of writing JUnit tests (the Jasmine way)

    Recently I wrote a lot of Jasmine tests for a small personal project. It took me some time until I finally got the feeling of getting the tests right. After this, I always have a hard time when I am switching back to JUnit tests. For some reason JUnit tests did no longer feel that good and I wondered if it would be possible to write JUnit tests in a way similar to Jasmine tests.

    Jasmine is a popular Behavior Driven Development testing framework for JavaScript that is inspired by RSpec (a Ruby BDD testing Framework).

    A simple Jasmine test looks like this:

    describe('AudioPlayer tests', function() {
      var player;
    
      beforeEach(function() {
        player = new AudioPlayer();
      });
      
      it('should not play any track after initialization', function() {
        expect(player.isPlaying()).toBeFalsy();
      });
      
      ...
    });

    The describe() function call in the first line creates a new test suite using the description AudioPlayer tests. Inside a test suite we can use it() to create tests (called specs in Jasmine). Here, we check if the isPlaying() method of AudioPlayer returns false after creating a new AudioPlayer instance.
    The same test written in JUnit would look like this:

    public class AudioPlayerTest {
      private AudioPlayer audioPlayer;
    
      @Before 
      public void before() {
        audioPlayer = new AudioPlayer();
      }
    
      @Test
      void notPlayingAfterInitialization() {
        assertFalse(audioPlayer.isPlaying());
      }
      
      ...
    }

    Personally I find the Jasmine test much more readable compared to the JUnit version. In Jasmine the only noise that does not contribute anything to the test are the braces and the function keyword. Everything else contains some useful information.
    When reading the JUnit test we can ignore keywords like void, access modifiers (private, public, ..), annotations and irrelevant method names (like the name of the method annotated with @Before). In addition to that, test descriptions encoded in camel case method names are not that great to read.

    Besides increased readability I really like Jasmine's ability of nesting test suites.
    Let's look at an example that is a bit longer:

    describe('AudioPlayers tests', function() {
      var player;
    
      beforeEach(function() {
        player = new AudioPlayer();
      });
      
      describe('when a track is played', function() {
        var track;
      
        beforeEach(function() {
          track = new Track('foo/bar.mp3')
          player.play(track);
        });
        
        it('is playing a track', function() {
          expect(player.isPlaying()).toBeTruthy();
        });
        
        it('returns the track that is currently played', function() {
          expect(player.getCurrentTrack()).toEqual(track);
        });
      });
      
      ...
    });

    Here we create a sub test suite that is responsible for testing the behavior when a Track is played by AudioPlayer. The inner beforeEach() call is used to set up a common precondition for all tests inside the sub test suite.

    In contrast, sharing common preconditions for multiple (but not all) tests in JUnit can become cumbersome sometimes. Of course duplicating the setup code in tests is bad, so we create extra methods for this. To share data between setup and test methods (like the track variable in the example above) we then have to use member variables (with a much larger scope).
    Additionally we should make sure to group tests with similar preconditions together to avoid the need of reading the whole test class to find all relevant tests for a certain situation. Or we can split things up into multiple smaller classes. But then we might have to share setup code between these classes...

    If we look at Jasmine tests we see that the structure is defined by calling global functions (like describe(), it(), ...) and passing descriptive strings and anonymous functions.

    With Java 8 we got Lambdas, so we can do the same right?
    Yes, we can write something like this in Java 8:

    public class AudioPlayerTest {
      private AudioPlayer player;
      
      public AudioPlayerTest() {
        describe("AudioPlayer tests", () -> {
          beforeEach(() -> {
            player = new AudioPlayer();
          });
    
          it("should not play any track after initialization", () -> {
            expect(player.isPlaying()).toBeFalsy();
          });
        });
      }
    }

    If we assume for a moment that describe(), beforeEach(), it() and expect() are statically imported methods that take appropriate parameters, this would at least compile. But how should we run this kind of test?

    For interest I tried to integrate this with JUnit and it turned out that this actually very easy (I will write about this in the future). The result so far is a small library called Oleaster.

    A test written with Oleaster looks like this:

    import static com.mscharhag.oleaster.runner.StaticRunnerSupport.*;
    ...
    
    @RunWith(OleasterRunner.class)
    public class AudioPlayerTest {
      private AudioPlayer player;
      
      {
        describe("AudioPlayer tests", () -> {
          beforeEach(() -> {
            player = new AudioPlayer();
          });
        
          it("should not play any track after initialization", () -> {
            assertFalse(player.isPlaying());
          });
        });
      }
    }

    Only a few things changed compared to the previous example. Here, the test class is annotated with the JUnit @RunWith annotation. This tells JUnit to use Oleaster when running this test class. The static import of StaticRunnerSupport.* gives direct access to static Oleaster methods like describe() or it(). Also note that the constructor was replaced by an instance initializer and the Jasmine like matcher is replaced with by a standard JUnit assertion.

    There is actually one thing that is not so great compared to original Jasmine tests. It is the fact that in Java a variable needs to be effectively final to use it inside a lambda expression. This means that the following piece of code does not compile:

    describe("AudioPlayer tests", () -> {
      AudioPlayer player;
      beforeEach(() -> {
        player = new AudioPlayer();
      });
      ...
    });

    The assignment to player inside the beforeEach() lambda expression will not compile (because player is not effectively final). In Java we have to use instance fields in situations like this (like shown in the example above).

    In case you worry about reporting: Oleaster is only responsible for collecting test cases and running them. The whole reporting is still done by JUnit. So Oleaster should cause no problems with tools and libraries that make use of JUnit reports.

    For example the following screenshot shows the result of a failed Oleaster test in IntelliJ IDEA:


    If you wonder how Oleaster tests look in practice you can have a look at the tests for Oleaster (which are written in Oleaster itself). You can find the GitHub test directory here.

    Feel free to add any kind of feedback by commenting to this post or by creating a GitHub issue.